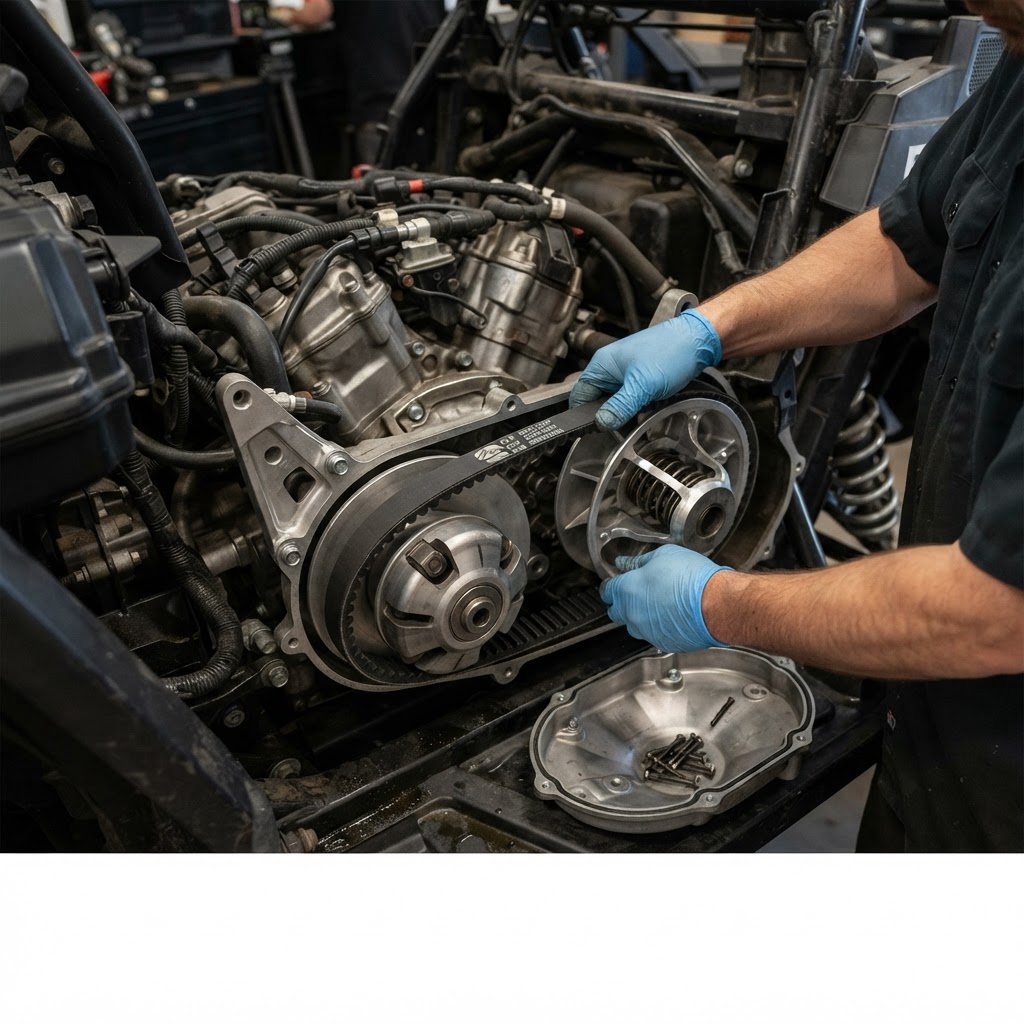
Learn the essential UTV belt break-in procedure to prevent glazing and premature failure. Our shop guide covers heat cycles, sheave cleaning, and pro tips.
A proper UTV belt break-in procedure is the single most important step you can take to ensure the longevity of your Continuously Variable Transmission (CVT). By following a disciplined series of heat cycles—typically involving 20 to 30 miles of varied, low-load driving in Low range—you allow the belt to seat perfectly against the clutch sheaves and achieve its optimal operating temperature. This process prevents belt glazing, reduces slippage, and significantly extends the life of your drive system, saving you from trailside repairs and expensive part replacements.
Why Your Drive Belt Needs a Break-In Period
When you pull a brand-new belt out of its sleeve, it isn't ready for wide-open throttle (WOT) runs or heavy rock crawling. Modern CVT belts are complex composites of rubber compounds and high-strength cords (like Aramid or Carbon Fiber). During the manufacturing process, release agents are used to get the belt out of the mold, and the rubber itself hasn't reached its final cured state.
The UTV belt break-in procedure serves two primary technical purposes. First, it wears away any manufacturing residues and allows the belt's side-walls to conform to the specific angle of your clutch sheaves. Second, it subjects the belt to controlled thermal cycles. These cycles "heat set" the rubber, increasing its resistance to future heat damage and improving its grip. Without this, the belt is prone to "glazing"—a condition where the surface becomes hard and slick, leading to constant slipping and eventual failure.
Preparing the Clutches Before Installation
You cannot achieve a perfect break-in on dirty hardware. Before installing a new belt from our /parts-categories, you must inspect and clean the primary and secondary clutch sheaves.
- Inspect for Grooves: Run a fingernail across the sheave faces. If you feel deep ridges or "valleys," your clutches may need resurfacing or replacement.
- Scuff the Surfaces: Use a fine-grit Scotch-Brite pad to lightly scuff the sheave faces. This removes old belt residue and creates a micro-texture that helps the new belt grip.
- Chemical Clean: Wipe the sheaves down thoroughly with aerosol brake cleaner or 90% Isopropyl alcohol on a lint-free rag. This removes oils and the "shipping wax" found on new belts.
- Wash the Belt: Many pros recommend washing the new belt in warm, soapy water and letting it air dry. This removes mold-release agents that can cause initial slipping.
The Step-by-Step UTV Belt Break-In Procedure
Once the belt is installed and the cover is secure, follow this specific protocol. This applies to most major manufacturers, including Polaris, Can-Am, and Honda (SXS models with CVTs).
Phase 1: The Initial Heat Cycle
Drive the vehicle in Low Range for the first 15-20 minutes. Keep your speeds between 10 and 25 MPH. The goal here is to vary the RPMs constantly. Do not hold a steady throttle position. This variation ensures the belt travels up and down the sheaves, seating the entire contact surface.
Phase 2: The Cooling Period
Turn off the engine and let the belt cool down completely. This should take about 30 minutes. This "thermal rest" is where the chemical bonding of the rubber compounds stabilizes. Skipping this cooling phase is a common mistake that leads to premature cord separation.
Phase 3: Secondary Heat Cycle
Repeat the driving process for another 15-20 miles. During this phase, you can introduce slightly higher speeds, but still avoid full-throttle starts or heavy towing. Stick to flat or rolling terrain rather than steep inclines or deep mud.
Summary of Break-In Parameters
| Action | Requirement | | :--- | :--- | | Total Distance | 25 to 50 miles | | Drive Range | Low Range (preferred) | | Throttle Input | 0% to 50% (varied) | | Max Speed | 30 MPH | | Cooling Cycles | 2 minimum |
Pro Tips for Different Riding Scenarios
At our shop, we often see belts fail because riders treat every environment the same. Depending on where you ride, you may need to adjust your approach to the UTV belt break-in procedure.
Scenario A: The Dunes Rider
If you are prepping for a trip to the sand, do not perform your break-in at the dunes. Sand creates immense drag and instant heat. Instead, perform your break-in on a hard-pack dirt road or around your neighborhood before you leave. A belt that is broken in on hard-pack will last twice as long in the sand as a belt that was "broken in" (and likely scorched) on a dune.
Scenario B: The Utility Worker
If you use your UTV for hauling wood or towing trailers, the same rules apply. You must perform the break-in empty. Loading the bed or attaching a trailer increases the clamping force and heat production before the belt has properly seated, which almost guarantees a "burnt spot" or an hourglass shape in the belt.
How to Tell if Your Belt is Broken In
You will notice a physical change in how the machine feels. A broken-in belt typically offers smoother engagement (less "jerking" when you take off) and produces less noise. If you pull the CVT cover after 50 miles, the belt should have a matte finish on the sides. If it looks shiny or like polished glass, you have glazed the belt, likely by applying too much throttle too early.
For those looking for high-performance options that can withstand higher heat after this process, browse our selection of heavy-duty brands to find belts with carbon-tensile cords designed for extreme conditions.
Common Mistakes to Avoid
- Staying in High Gear: Many riders try to break in a belt in High range. This keeps the belt at the bottom of the primary clutch, creating more heat and less surface area contact. Use Low.
- High-Speed Runs: Wind resistance at 50+ MPH creates significant load. Save the top-speed runs for after the 50-mile mark.
- Water Ingress: If you get water in your CVT housing during break-in, you must stop immediately, drain the housing, and potentially restart the cleaning process. Water causes the belt to slip and flash-heat the sheaves.
Maintenance After the Break-In
After completing the UTV belt break-in procedure, your job isn't entirely over. We recommend blowing out your CVT housing with compressed air every 200-300 miles. Dust is an abrasive that acts like sandpaper on your sheaves and belt. By keeping the housing clean, you ensure that the perfect seat you just achieved lasts for thousands of miles.
If you're unsure about the state of your clutches or need a professional to handle the installation and alignment, visit our /gallery to see the custom builds and service work we perform for local riders. Proper alignment is just as critical as the break-in itself.
Conclusion
Taking the time to perform a correct UTV belt break-in procedure is the difference between a belt that lasts 3,000 miles and one that snaps at 300. By cleaning your sheaves, varying your speeds, and allowing for proper cooling cycles, you ensure your machine is ready for the toughest trails. Treat your new belt with patience, and it will return the favor with reliability and performance when you need it most.
FAQ
How many miles does it take to break in a UTV belt?
A standard break-in requires between 25 and 50 miles of driving. During this time, it is vital to vary your speed and avoid full-throttle applications. This distance allows for multiple heat cycles, which are necessary for the rubber compounds to stabilize and the belt to seat against the clutch sheaves.
Can I break in a UTV belt in one long ride?
It is not recommended to do it in one continuous session. The cooling-off period is just as important as the driving period. Allowing the belt to cool to ambient temperature twice during the process helps "set" the rubber, making it more durable and resistant to future heat-related failures.
What happens if I don't break in my UTV belt?
If you skip the break-in, you risk "glazing" the belt. This creates a hard, slick surface on the belt's sidewalls, leading to chronic slipping, excessive heat, and reduced power transfer. In extreme cases, the belt can suffer from cord separation or "grenade," potentially damaging your CVT cover or internal components.
Do I need to clean a brand-new belt?
Yes, it is highly recommended. New belts often have a "mold release" chemical on the surface from the manufacturing process. Washing the belt with warm, soapy water and thoroughly cleaning your clutch sheaves with brake cleaner ensures there is no oily residue that could cause the belt to slip and burn during its first few miles.
Should I use Low or High gear during break-in?
You should primarily use Low gear. Low gear allows the engine to stay in a higher RPM range while keeping the vehicle speed down, which helps the belt move through its full range of motion on the sheaves without the extreme loads and heat associated with High-gear operation.