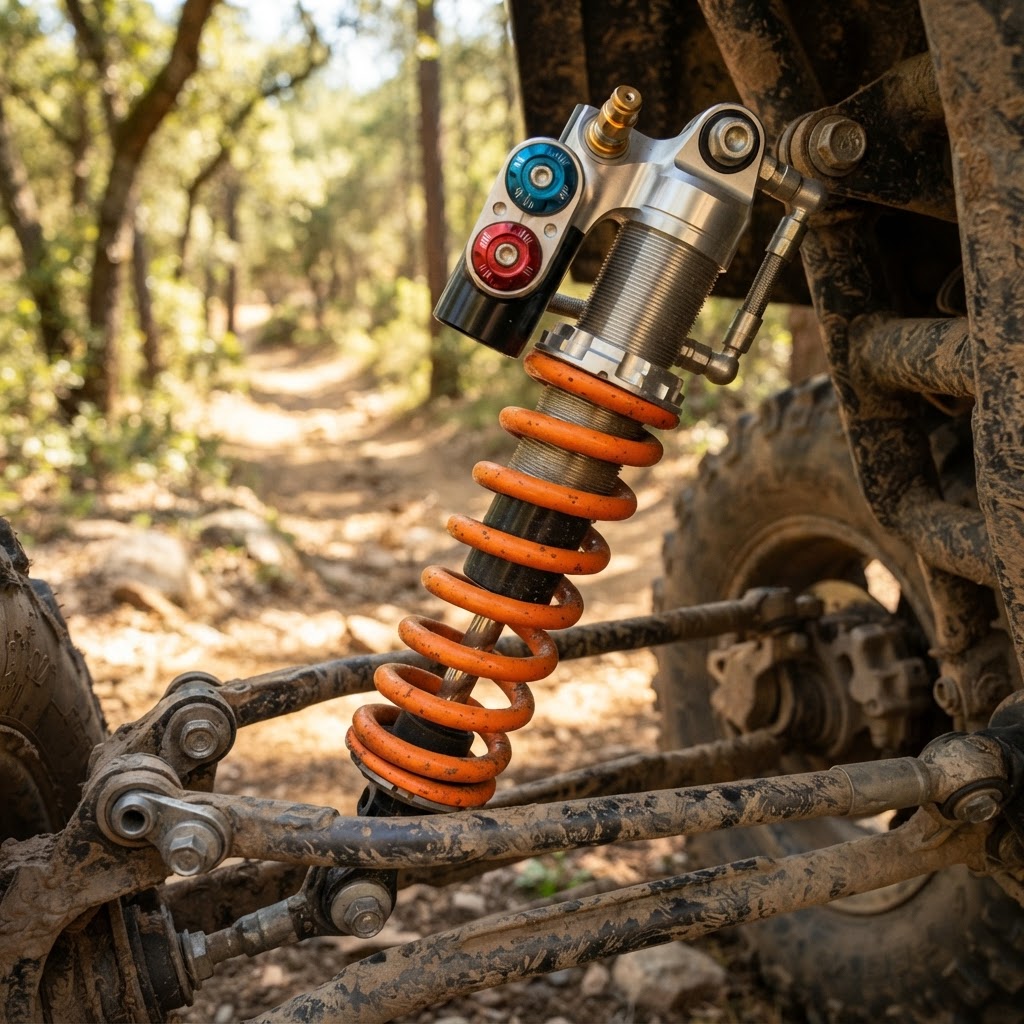
Learn how to master your ride with our UTV suspension tuning guide for trail riding, covering preload, compression, and rebound settings for ultimate comfort.
To effectively use a UTV suspension tuning guide for trail riding, you must focus on three primary adjustments: spring preload, compression damping, and rebound damping. By setting your ride height first via preload, then adjusting your compression for impact absorption and your rebound for stability, you can transform a harsh, jarring ride into a smooth, controlled experience. This guide will teach you how to identify specific handling issues, translate trail feedback into shock adjustments, and understand when it is time to move beyond factory settings into professional re-valving or aftermarket spring kits.
The Importance of a Dialed-In Suspension
Most UTVs come from the factory with a 'one-size-fits-all' suspension setup. While manufacturers like Polaris, Can-Am, and Honda do an incredible job with stock valving, they cannot account for your specific weight, the cargo you carry, or the unique terrain of our local trail systems. A machine tuned for the wide-open desert of the Southwest will perform poorly on the tight, root-filled, and rocky trails common in our service area. Tuning your suspension isn't just about comfort; it is about safety, tire contact patch consistency, and reducing the physical fatigue that ends a ride early.
Understanding the Core Components of Your Shocks
Before you start turning clickers, you must understand the hardware you are working with. Most modern sport and utility UTVs utilize coil-over gas shocks. These consist of a nitrogen-charged reservoir, a shock body filled with oil, a piston with shim stacks, and one or more coil springs.
Spring Preload and Ride Height
Preload is the amount of tension placed on the spring when the shock is fully extended. It is the most misunderstood adjustment in off-roading. Many riders mistakenly use preload to make the suspension 'stiffer.' In reality, preload’s primary job is to set the ride height. If your UTV is sagging too low, you lose ground clearance and bottom out more easily. If it is too high, your center of gravity rises, and you lose 'droop' travel, which is essential for keeping tires on the ground when dropping into holes.
Compression Damping (Low-Speed vs. High-Speed)
Compression damping controls how fast the shock collapses when it hits a bump.
- Low-Speed Compression (LSC): Controls chassis roll during cornering, brake dive, and slow-speed technical crawling.
- High-Speed Compression (HSC): Controls the shock's reaction to sudden, sharp impacts like hitting a square-edge rock or landing a jump.
Rebound Damping
Rebound damping controls how fast the shock extends back to its original position after being compressed. If rebound is too fast, the machine will feel like a pogo stick, 'bucking' you over bumps. If it is too slow, the shock will 'pack,' meaning it doesn't return fast enough for the next bump, eventually running out of travel.
| Adjustment | Primary Function | Symptom of Too Much | Symptom of Too Little | | :--- | :--- | :--- | :--- | | Preload | Sets Ride Height | Harsh ride, no droop | Frequent bottoming, low clearance | | Compression | Absorbs Impacts | Jarring feel, deflected tires | Excessive diving, wallowing ride | | Rebound | Controls Extension | Shock 'packing', harshness | Bucking, bouncy rear end | | Crossover | Dual-rate Transition | Abrupt stiffness change | Premature bottoming on big hits |
Step-by-Step UTV Suspension Tuning Guide for Trail Riding
To get the best results, follow this systematic approach. Never change more than one setting at a time, and always keep a notebook to track your changes.
Step 1: Establish Your Baseline
Before touching a tool, measure your current ride height on a flat surface with your typical load (including passengers and gear). Refer to your owner's manual for the factory-recommended ride height. Clean your shock threads thoroughly with a wire brush and lubricant before attempting to move the preload collars. Check our /parts-categories for specialized spanner wrenches if your tool kit is missing them.
Step 2: Setting the Sag
Typically, you want about 30% of your total shock travel to be used as 'sag' when the vehicle is at rest with its passengers. Adjust your preload collars until you reach the desired ride height. Remember: increasing preload does not change the spring rate; it only changes the starting point of the stroke.
Step 3: The 'Bumper' Test
With the machine stationary, push down hard on the front and rear bumpers and let go. The machine should rise quickly but settle immediately without oscillating. If it bounces more than once, your rebound is too fast. If it rises slowly like it’s stuck in syrup, your rebound is too slow.
Step 4: The Trail Test
Take your machine to a familiar section of trail. We recommend a loop that includes a mix of small chatter, a few larger G-outs, and some technical off-camber sections. Drive the loop at your normal pace. Note where the machine feels unsettled.
Advanced Tuning: Solving Common Trail Handling Issues
As a professional shop, we often see riders struggling with the same three issues. Here is how to handle them using your UTV suspension tuning guide for trail riding principles.
Handling 'Bucking' in the Rear
If the rear of your UTV feels like it wants to overtake the front when hitting a series of bumps (whoops), your rebound is likely too fast. The spring is releasing its stored energy too quickly. Increase your rebound damping (turn the clicker toward 'Slow' or 'Hard'). If you have already maxed out your rebound and it still bucks, you may need a heavy-duty spring or a professional re-valve from our /shop.
Fixing the 'Harsh' Small-Bump Feedback
If you feel every pebble and root in your steering wheel, your low-speed compression is likely too stiff, or your preload is too high. Try backing off the compression clickers two clicks at a time. If the harshness persists, check your tire pressure. Over-inflated tires often mimic bad suspension settings.
Correcting Nose-Dive During Braking
When you stay hard on the brakes into a corner and the front end dives aggressively, it upsets the balance of the machine. Increase your front low-speed compression. This slows the rate at which the weight transfers forward, keeping the chassis flatter and allowing the tires to bite more effectively.
When to Upgrade: Beyond the Clickers
Sometimes, the factory hardware simply cannot meet the demands of aggressive trail riding. If you find yourself constantly bottoming out despite high compression settings, or if the ride remains harsh despite low settings, you have reached the limits of the stock components.
Dual-Rate Spring Kits
Most stock UTVs use a single-rate spring or a very basic progressive setup. A true dual-rate system uses two separate springs with a crossover ring. This allows for a soft 'tender' spring to soak up small chatter while a stiffer 'main' spring handles big hits. Upgrading your springs is the most cost-effective way to transform your machine. You can view various spring configurations in our custom build /gallery.
Shock Re-valving and Internal Bypass
For the ultimate ride, shocks can be disassembled and the internal shim stacks rearranged. This 'valving' determines how much resistance the oil meets as it flows through the piston. A professional tuner can customize this flow to match your specific riding style and the local terrain of our service area.
Pre-Ride Suspension Inspection Checklist
Before heading out to the trails, perform this quick 5-minute inspection to ensure your suspension is safe and functional:
- Check for Leaks: Look for fresh oil on the shock shafts or around the seals. A leaking shock is a failed shock.
- Inspect Bushings: Wiggle the shock bodies. If there is play at the mounting bolts, your bushings are worn and will cause a 'clunking' sound.
- Verify Clicker Position: Ensure both the left and right shocks are set to the same number of clicks. It is common for them to vibrate loose over time.
- Clean the Shafts: Dust and dried mud act like sandpaper on your shock seals. Wipe them down with a clean, soft cloth.
- Check Nitrogen Pressure: If you have the tools, verify the PSI in your reservoirs. Loss of nitrogen leads to oil cavitation and 'fading' during long rides.
Practical Scenario: The Family Trail Rig vs. The Weekend Warrior
Scenario A: The Loaded Family Rig A rider with a 4-seater UTV carries a full cooler, spare tire, and four adults. The machine sits low and hits the skid plate on every rock. Solution: The rider needs to increase preload significantly to regain ride height. Because of the extra weight, they should also increase compression damping to prevent the shocks from blowing through their travel.
Scenario B: The Solo Woods Racer A rider who frequently hits tight, technical wooded trails at high speeds. The machine feels 'twitchy' and bounces off roots. Solution: This rider needs faster rebound to keep the tires in contact with the ground over rapid-fire roots, but softer low-speed compression to allow the suspension to track straight through the technical sections.
Conclusion
Mastering your machine starts with understanding how it reacts to the terrain. By using this UTV suspension tuning guide for trail riding, you can move away from 'guessing' and toward a scientific approach to performance. Start with your ride height, find a baseline for your clickers, and make small, incremental changes based on the feedback your machine gives you on the trail. If you find that your factory shocks just aren't cutting it for the rugged terrain in our local area, don't hesitate to reach out to the pros. Whether you need a simple spring upgrade or a full custom re-valve, we are here to help you get the most out of your off-road adventures.
Frequently Asked Questions
How often should I service my UTV shocks?
For most trail riders, we recommend a professional shock service every 1,000 to 1,500 miles. Over time, the internal shock oil breaks down due to heat and friction, and the nitrogen gas can permeate through the seals. Regular service ensures your damping remains consistent and prevents expensive damage to the internal piston and shock body.
What is the difference between 'Fast' and 'Slow' rebound?
'Fast' rebound means the shock extends quickly after a bump, which is good for rapid successions of small bumps to prevent 'packing.' 'Slow' rebound means the shock extends more gradually, which is necessary to prevent the 'bucking' or 'pogo-stick' feeling after a large jump or a deep G-out. Most clickers are labeled with H (Hard/Slow) and S (Soft/Fast).
Why is my UTV bottoming out even on small jumps?
If you are bottoming out on small impacts, you likely have insufficient spring preload or your compression damping is set too soft. First, check your ride height to ensure you aren't starting too deep in the stroke. If ride height is correct, increase your high-speed compression damping. If the problem persists, your springs may be 'sacked out' and require replacement.
Can I tune my suspension without high-end reservoir shocks?
Even basic UTV shocks usually offer preload adjustment. While you may lack the compression and rebound clickers found on high-end Fox or Walker Evans units, adjusting your preload can still significantly improve your ground clearance and ride quality. If your shocks are non-adjustable, the only way to tune the ride is through aftermarket spring kits or replacing the shocks entirely.